Author Archives: shyam

About shyam

Network professional , Entrepreneur , technology enthusiast , still not a geek

What all these black boxes means ?


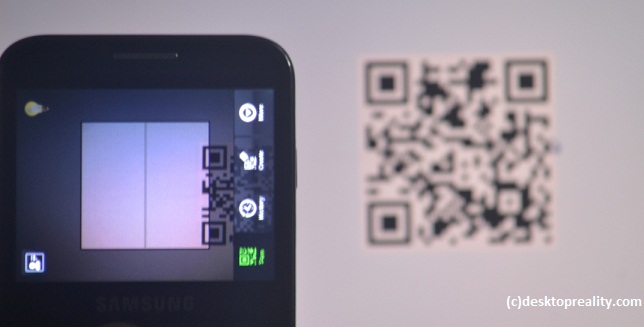
May be you already noticed these kind of  bar code like images on some websites , promo materials and some business cards that handed to you .  You guessed it right . These black and white squires contains  intelligence that can be translated by scanning software installed on your smart phone .

This system is called QR code where QR stands for quick response code . It is one of the emerging standards by which pictures speak better than words. The basic underlying principle is similer to the bar code system.

The QR code will come handy if you need to add little bit of  technical touch your hoardings or business cards so that  viewers will be prompted to scan the qr code and decode the data in their smart phone . And the main advantage is that you can track how many persons actually viewed your code using their phones. It will be as good as getting information about how many persons glanced at the hoarding you have placed on the airport .

So let us look in to the process of creating a QR code for yourself and using a mobile phone to read the code .

Creating the code :

The code can contain a plain text data , phone number or a website address and there are numerous  websites  available that let you create a QR code for free.

We are creating the QR code using the link from kaywa.com  Please use this link to create the code for you

http://qrcode.kaywa.com/

now use this code on your printed stationary or websites or hoardings and let the qr-code do the magic for you

 Decoding the QR :

Second part is obviously about how to read these codes. It is quite simple if you have a moble phone smart enough to install any kind of software . I used an ardriod phone and downloaded an app named QR-Driod from the google play store

. Now just run the app and point your phone camera to the QR code image and that’s it , it is decoded and displayed on your phone . If it is plane text it will be shown on your screen or you will get a link if it is an info about a website .


Now try to scan what is the contents on the QR code on the top of this post . 


How the files are compressed ?


Using the file compression is a normal process for our computing needs , whether in the case of data transmission or data storage . Even the layman in computing know how to zip a file and unzip it   . But what happens when you compress a file , how the file size of the original file reduced  and still you can un compress it and restore all the data ?  Hope we can have a basic discussion on it .


    When I tried to compress my word file , it compresses well and file size reduced to a considerable amount and when I try to compress my jpg file , it does not reduced much and in some cases the size of the  file increased a bit , why it is so ?

hope it is your question .  Why the jpeg file is not responding well to file compression software is because it is already a compressed format. If you try to compress further , actually the size will be increased due to certain overhead associated with it .

Suppose you have a text file with you , and you  found out that the word ” Computer ” is repeated 30 times in that text file . So the  word is redundantly used 29 times . Why can not we use a procedure so that when ever the word Computer is repeated a pointer is used to indicate that this word is a repeating  from the first line of the text .  The example we mentioned is the basic idea behind the  loss-less file compression . ie we will observe a binary string in the file and when ever that string is repeated a pointer is used to mention that this string is used previously , there by saving the space needed to save that bits .  Wen we are uncompressing   the file ,  the reverse process happens and the file will be available intact .

But the case of  your Jpeg file is little bit different. Jpeg is a compressed file format . It uses a  Lossy file compression procedure . ie it compresses a file based on some assumption about the picture details and reducing the unnoticed , unwanted elements to reduce the size . The same thing happens with your mp3 , mp4 formats and many video compression technologies .


So a well compressed file  does not have any redundant information on it as  all of them are removed during the process if compression , it does not make sense to  run your compression program again on it .


Windows 7 Recovery Environment partition

My initial machine has a harddisk capacity of  540 MB.   At that time if you ask me about loosing 200 MB space I will say it means a lot to me .  But it was long back in 1994 and my home machine has  2000 times capacity than my original one .


So I will find it curious  that  people are debating about how we can save that 200 MB space that your windows machine take up automatically  during the process of installation.   I am sure it will not be hot topic  for any one  if windows 7 just take an additional 10 GB for its windows partition.  It is just like the case of  People who patiently waited on the bus during all those traffic jams will find it really irritating to wait for  the  bus driver  to park  the bus before you get down .

Windows 7 Insists on  200 MB system partition because it is the area where it stores the windows recovery environment .   Leave it as such . you are not going to benefit from saving the penny  and loosing the  pound.

Auto-uplink or auto MDI-X


When ever you are cabling your network using UTP cable system , the terms you used to hear is normal cabling and cross over cabling  .

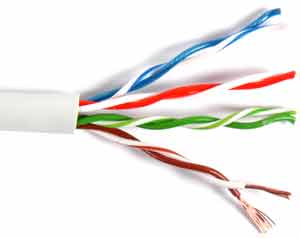
The typical UTP cabling system uses AT & T 568B color code . If you are having a one to one connection , it is called a normal connection and if the cable is crimped in such a way that the transmitter is reached on the receiving  point on the other end it is called cross over cable


When ever you have to connect two dissimilar devices together using a UTP cable , you are using a normal or one to one crimped cable . examples are connections between swtich to computer , switch to router

when you need to connect two similar devices together , you have to use a cross crimped cable . ie when you are connecting two computers together , we are using a cross crimped cable .


Ok , this is what I have been thought in my elementary sessions about networking. So that basically means  to connect my laptop to my desktop , I have to make a cross crimped cable system and I can not use a normal crimped cable , is it ?


          well , your network essentials class room notes are not for ever.  Try to add a new term called auto up link  to your notes . ie your new generation network cards are capable of detecting the type of network cable you plugged in to their ports and they can make necessary arrangements needed for connectivity.


So that means in a modern network environment you do not have to care about the cross crimped cable anymore . Just use your normal patch cord to connect your laptop to desktop and if any one of your system has auto up link capability , it will work fine.

installing XP after windows 7


 How many times you faced with a customer who need to install windows XP to his desktop after you finished installing windows 7 and loaded all the drivers and soft wares ?

Moving from a lower version of operating system to a higher version and mutli booting was always an  easier task because your newer operating system will always recognize and set the required parameters to co exist with the older one.

Back in the time of introduction of windows XP customer has the issue of mutlibooting between windows 98 and windows XP . But at that time the concept was relatively easy because windows 98 does not have a boot manager and windows XP has a boot manager .

But if  both of your operating system has a boot management system and if that boot management systems are not ready to co-operate with each other , then it is going to be nightmare for the IT team.


So the question is

Can you install windows XP after installing Windows 7 or Vista

It is always better that you plan the installation before hand and avoid such a situation . But if you are trapped in such a situation , read on and do as we mentioned and things are going to be fine.

Scenario :

You have two partition on your machine . C drive is the active partition in which you installed windows 7  and it was working fine . Then you installed windows XP by booting from XP boot CD and installed XP to the D drive . After XP installation is over , the only OS that is showing up is XP and yes you can still access your windows 7 drive and data but you can not bring up the OS

may be you have  tried to repair your windows 7 by booting up from the 7 DVD and now only 7 is showing up and you badly need a situation in which both of the operating systems are functional . Right ?

 Why this happens (to me) ?

from the early days of windows NT family of operating systems , Microsoft follows  a common structure for the boot management based on NT loader , boot.ini and bootsect.com . All those concepts were changed in windows Vista/7 /2008 series of operating system with BCD boot and bootmgr. We are not going to granular details but lot of things changed that made it difficult for windows XP  to understand how the windows 7 is handling the booting process of your system and it will destroy the structure created by 7 and follow its own procedure .


Solution  :


we are assuming you installed windows XP after windows  7 and now only XP boots up. After you reach the desktop of XP , insert the windows 7 DVD to the optical drive.

Go to command prompt by typing CMD at the run option and go to the drive letter of your optical drive. we are assuming it as E:  

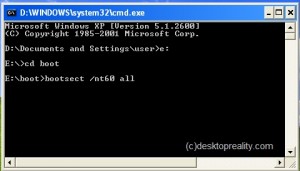
now move to the folder named boot by typing cd boot  , and type the following command

    bootsect.exe /nt60 all


Now the boot sector for windows 7 is fixed . Reboot and you can see that machine will boot to windows 7. Now our aim is to create a multi boot environment where windows 7 and windows XP can co exist.

To achieve it  you have to edit the boot sector with BCDEdit option  . There are so many thirdparty software available to do this task  but you follow the official way from Microsoft.

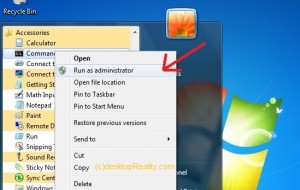
We assume you  now booted up your windows 7 and it is working fine. Now  start your command prompt with administrative privileges  . For that  go to


All programs –> Accessories –> right click on command prompt and select run as Administrator 


From the command prompt run the follwing command in the specified order

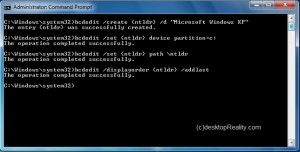
bcdedit  / create  {ntldr} /d  ” Microsoft Windows XP “

bcdedit  /set  {ntldr}  device partition =C:

bcdedit  /set  {ntldr} path  \ ntldr

bcdedit  /displayorder  {ntldr} /addlast

Please refer to the screen shot for clarification of the commands

Now exit the command prompt and reboot your windows 7 , Now your system will show dual boot option between windows 7 and XP.

Hope you find it useful . Give us feedback about this post by commenting here and liking our Facebook Page .


DAS, NAS and SAN


So many Acronyms , and people find it really hard to memorize all these computing industry acronyms or alphabet soups as some one said. Anyway  here we are going to discuss about three alphabet soups that is normally confusing a typical infrastructure professional  when it comes to the storage solutions .


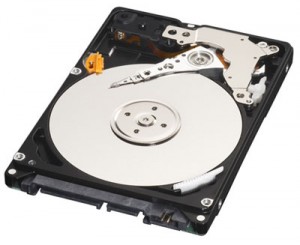
As far as the data storage is concerned , hard disk is the primary online storage solution from the early days of  computing . Here we are discussing three terminologies associated  with hard disk data storage .


DAS  Direct attached storage

The normal method of data storage used by your typical machine . The hard disk is attached too your machine by means of a direct connector on your mother board or through additional add on cards. We are using normal IDE , Serial ATA or SCSI technologies for interfacing the hard disk .  The kind of data transfer on these systems is known as Block level data transfer.

We are using DAS for a normal desktop systems and entry level servers because it is cheaper to implement and maintain . But this technology limit the data storage to individual machines and any issue with the local system will affect the data on the system also .


NAS  – Network attached storage


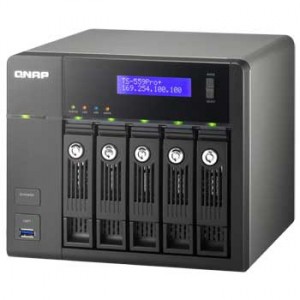
this concept is different from DAS because your data storage  is located on the network. Even though NAS devices are available as a stand alone box that connects to the network , they are just  customized machines loaded with file services like NFS or CIFS . ie if you are accessing a file server over the network and using the network share , it can be considered as a NAS.

If a company is using a dedicated NAS devices as shown above , it means that these devices contain an embedded  stripped down OS and equipped with a RAID controller for improved hard disk performance and multiple network cards for fault tolerance  . You can also use a regular  computer loaded with operating systems like Free NAS for achieving similar  result.

NAS  is using file level data transfer compared to the block level data transfer in DAS . The issue with the NAS devices is that you can not make NAS as your prime data storgae device as you need to boot from a local harddisk to access the NAS. So you need a DAS , boot to the local OS and then access NAS. so NAS will be best suited in situations where you need a central storage repository for your Data.


 SAN – Storage Area Networks 


So what if you need the functionality of the DAS  like block level transfer and  boot from the hard disk option and still need the flexibility and security of a NAS , then your trivial option will be a SAN.


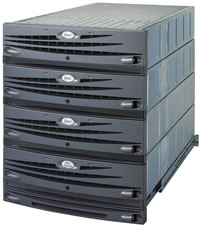
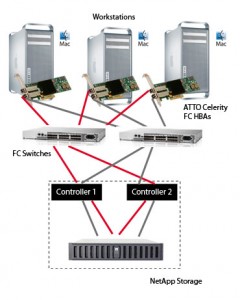
a SAN  is  also a dedicated computing equipment loaded  with   many hard disk and RAID functionality but the main difference from SAN is that it attached to the  system using the SCSI commands itself using a dedicated connectivity system known as fiber channel . ie you are plugging in FC cards to your system which in turn connect  to your SAN box using optical fiber cables


It support multiple  computers to attach to a single storage and permitting access to the data at block level.  SAN is the ultimate choice of data centers and high end computing environments as it permits multiple computers to access a single hard disk and support  features like clustering and v motion.


Windows 7 deployment – the easy way


                   so many discussions are going on about deploying windows 7 easily on a large number of systems .  This post is a effort to present the relatively complex concept of windows 7 deployment to a person with normal computing skills .  We have deliberately avoided some extra procedure  like  server share based installation , system image manager based un attended file creation  so that you can try this procedure at your home lab.


What is deployment anyway ? 

we are discussing the concept of deployment from an IT professionals point of view . The term deployment  has its origin from the military and means  –To position  troops  in readiness for combat , but for civilians and computer users like us it means  distribute computers or other systems  systematically or strategically.

Let us discuss the scenario of installing operating system and application software to only one system .  We will surly follow an approach normally known as baby sitting your installation , ie you will sit in front of the computer , place the installation DVD in to the drive , click for what ever may be appearing on the screen until you see the finish  button .

But will you follow the same procedure if you have to install OS and application software to 500 systems and you have to finish it with in one day ? How many persons and effort will be needed to finish that task in the prescribed time schedule ? , this is where the concept of software deployment comes in to the scene . Just like the assembly line concept of a car manufacturing plant , Hope you got the point . 


 Deploying Windows 7 on your organization  


With the windows vista family of operating systems , Microsoft made the OS deployment process really easy and easy enough to discuss the matter on sites like this . Let us look what all things you need to start your experiments with OS deployment .

Scenario :

(a)You need to install windows 7 to so many machines on a single day and this routine is exercised everyday .

(b) you have to configure net books or client machines with out optical drives that force you to carry an external  DVD drive and  perform individual installation on each and every machines .

you can perform the steps explained on this post using third party softwares too , but that makes the total procedure prone to spyware attacks and will not be appreciated by  your organization . So we are only  using Microsoft  tools and procedures through out this exercise .


the official procedure for IT professional  include the use of a centralized storage solutions and network connectivity for the complete procedure . We are avioding such complex situations and trying to keep it simple .


What you need :

2 systems capable of running windows 7 or higher operating system  and an additional system which will represent your target systems

a USB drive with minimum 8 GB capacity

Windows 7 installation DVD and DVDs of all the software you need in your deployment

Windows AIK (Automated installation Kit) software DVD


1. Windows Automated installation Kit software . Download it from   Here 

2.   First machine is named as    technician computer   running windows 7  . You are going to install windows AIK on this machine .

3. A reference machine  named as Master Computer  with a clean windows 7 install with all the required software installed on  it.


Procedure :

 @ technician  Computer  :


1. Install AIK on the system .  there are three architecture for AIK , 32 bit , 64 bit and AMD 64 bit. For our session we are going to use the 32 bit ie X86 Architecture .
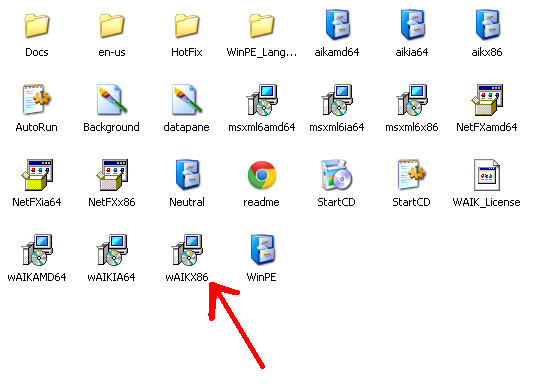
After the AIK is installed it will show up on the program  files . Go to deployment tools command prompt to open a specifically configured command prompt for the deployment process .
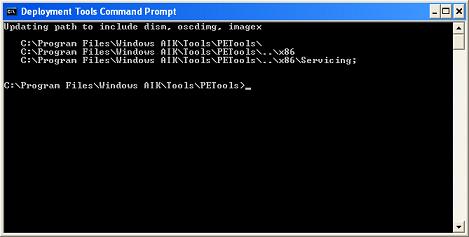
 

Now use copype .exe  command at the command promt to create the boot struture for your USB or CD media .

copype.exe  x86 c:\corona  where corona  is the folder to which you are going to copy the structure  for boot files
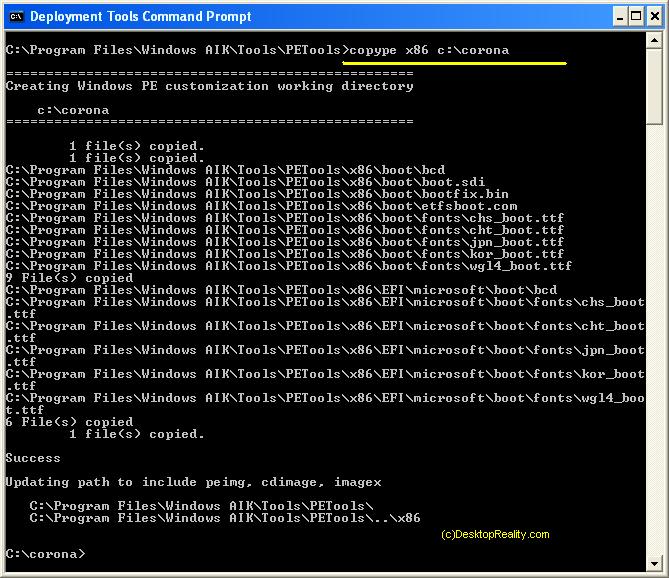


copy the file named winpe.wim  from the c:\corona directoy to c:\corona\iso\sources and rename it as boot.wim  .  the boot process need this file to be in the exact path and name as mentioned for the proper boot process .


Now copy the imagex.exe file from C:\Program Files\Windows AIK\Tools\x86       to   c:\corona\iso  

imagex.exe is the software that is going to capture your master computer  data to a single wim file. So do not skip this step.


Now you have to make your pen drive boolable  in windows PE so that we can capture the image of the master computer and apply it to the target systems 


Installing windows  PE to the USB drive :
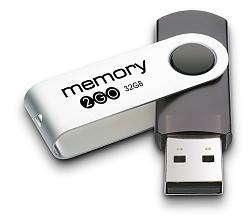
 

insert the pen drive to your technician computer running windows 7  and make sure it is shown up a drive in my computer

go to command prompt by typing cmd at the run option

type diskpart at the command prompt .  and you will reach the disk part prompt . It is an interactive prompt  as shown below


now run the command list disk to show the list of disks . if you have only one hardisk disk on your system , the usb drive will show up as disk 1


DISKPART > list disk

DISKPART >select disk 1         

DISKPART > clean

DISKPART >create partition primary 

DISKPART >select partition 1

DISKPART >active

DISKPART >format fs=ntfs quick

DISKPART >assign

DISKPART >exit

 Now copy  all the contents from c:\corona\iso to the root of your pen drive . ( here H:)   this step is critical , do not miss it 

Now insert the windows 7 dvd  to the technician  computer , from command prompt run the bootsect.exe which is located on the boot directory so copy the boot records to the pen drive .  we are assumbing the pen drive has a drive letter H: and DVD drive is G:

g:\boot\bootsect.exe  /nt60  h:


Now the process on your technician computer is almost over . you can move to master computer to capture the contents to a WIM file


 @ Master  Computer  :

 First thing you have to take care is that your master computer need  a fresh installation of windows 7 .  Do not activate the product onlne . let the process of activation performedat the target system.


Now we have to remove all the drivers specific to the hardware of the master computer by running sysprep command


c:\windows\system32\sysprep\sysprep.exe   /oobe /generalize /shutdown


after a while the system will shut down . Please do not bring up the windows 7 on this machine again now by turning it own. It will reload all the drivers back and will reverse the effect of this command.


Now boot the master computer  from the pen drive we prepared on the previous exercise   
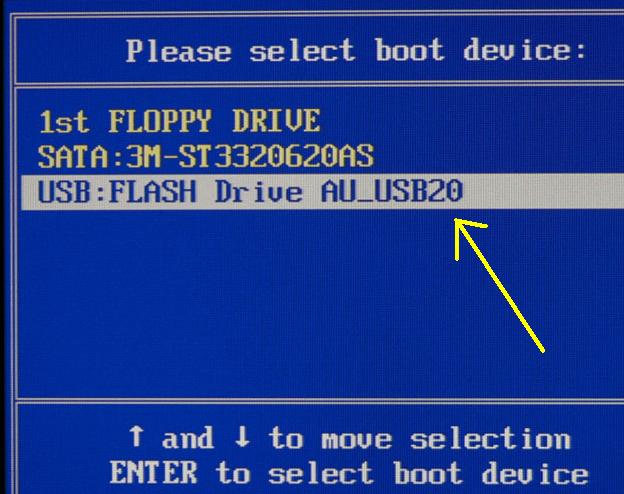


windows PE will boot up and will reach a command prompt .
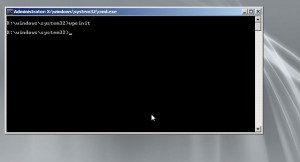


Now we need to capture the contents of your windows drive to a single .wim file . to do that execute the imagex.exe command  from your pen drive command prompt. On this scenario we are assuming that your  you pen drive is on E: and the  windows partition is on D:  

e:\>  imagex.exe   /capture   d:    e:\win7image.wim  “My Win7 Image ” /compress fast /verify 


Now what ever may be content of the windows partition is copyied to a single wim image and saved on your pen drive . Hope you are using a high capacity pen drive of atleast 8 GB so that the image will fit in to it .  It will take 10 minutes or so depending on the softwares you installed on your  master computer .


Now the procedure on your systems are almost over . Now you can move to any of your target computers to try out if  it is working prefect. But if you are reading it for all the while and doing it , we recommend  you to take a break and come back to read the next section .


Now we are all set to install the captured image WIM file to your netbooks , laptops or  office client machines.  The procedure to be done at your target systems are as follows

a. boot from the pen drive you prepared

b. clear all the partitions and set up new partitions .

c. apply the WIM file on the USB disk to the target system and make the system bootable


for all these procedure mentioned  above  we are using batch and script files to make the life easier for you . So we are back to our technicians Computer for a while to create that . don’t worry …it is lot easier than you think . so back to machine number 1


Plus the USB drive to your technician computer , assume the drive letter is E:

use notepad to create the following script file to be used with disk part and name it myscript.txt. You can just copy and paste from this post 

select disk 0
clean
create partition primary size=300
select partition 1
format fs=ntfs label=”System”
assign letter=S
active
create partition primary size=30000
select partition 2
format fs=ntfs label=”Windows” quick
assign letter=C

create partition primary
select partition 3
format fs=ntfs label=”Data” quick
assign letter=d
exit

we assigned 30 GB for your C drive and rest of the space for your D drive . Feel free to modify the script to adjust the size

Now create a batch file on the root directory of your pen drive as follows . Use notepad to create the file and name the file as boot.bat

diskpart /s  myscript.txt

imagex.exe /apply win7image.wim 1 c:          …..   please not that you do not miss the 1 on this command

c:

c:\windows\system32\bcdboot.exe c:\windows

exit


Now move towards your target system , plug th USB , boot from IT , wait for the windows PE to reach the command prompt , and type our magic command named boot  at the command prompt and rest will be handled by our faithful batch file 

Wait for the action to finish and reboot your system to bring up the windows 7  fully configured with all the software and settings you needed in less than 10 minutes. Now you have the magic of installing windows 7  on a tiny thumb drive. Please note that the above procedure work well with windows server 2008 also 


Please give us a feed back on the post after you try it on your environment and do point out any typos or factual mistakes

confused about 32 and 64 ?


What is the real difference between the 32 bit as well us 64 bit  technology in computing  ?  when ever the computing industry makes a transition from on technology to another , such discussions are common .  We can try to find out what makes the real  difference between your 32 and 64 bit technologies in few words as possible .


Basically a PC  is said to be 8, 16, 32 or 64 based on the microprocessor used . If you have a microprocessor which has an execution unit of 32 bit , you call it as 32 bit processor and in turn the machine will be known as 32 bit.

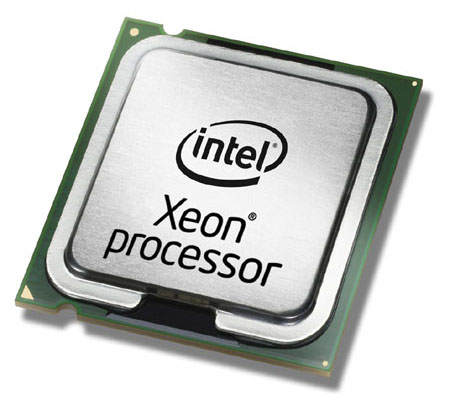
That means in a pure technical standpoint you have to check the data sheet of your processor to check if it is 32 bit or 64 bit. Three are more confusions regarding it because there are 32 bit processors with the capability to run 64 bit OS because of a feature called EMT. AD -64 bit optron and Intel -Xeon are some of the examples of pure 64 bit microprocessor

From intel terminology if they are saying x86 , then your Microprocessor is 32 bit  , if they are saying x64 , then you have a micro processor that is announced to you as 64 bit , but actually it is EMT -64 ie partially 64 bit . if  intel says IA 64 , they you have a pure 64 bit processor with you.


When talking about OS , the capability of the OS to fully utilize the power of your microprocessor is important. so If you have a 32 bit processor , the best thing is that you also have a 32 bit OS .  The same is also the case with 64 bit technology .  The bit capacity of the OS is normally the Word length, i.e. the number of bits that an OS can push down to the data bus of the microprocessor on a single clock  pulse .


Refocus your moments with Lytro


How many time you have been worried about the perfect moment that missed because your camera was focused on a different object , or taken an overexposed picture of a moment that will never come back ? Not a worry for the photographer in you any more ,


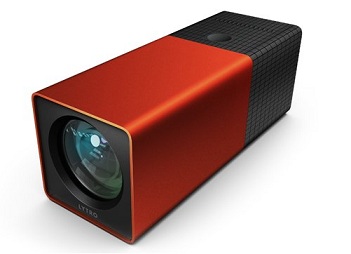
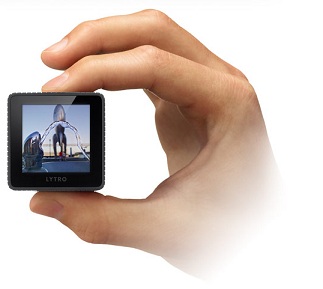
The Light field camera from Lytro is in the field for the last one year and improved dramatically all the way .  It is for any one who love to take photos without worrying  about any settings . The camera capture the entire light field , and so aptly called light fiend camera.


What I love about the camera  apart from the great concept and science behind it is the looks itself.  You can not compare it with any of the cameras you have seen . It resembles a kaleidoscope than a camera.


The basic concept behind the camera for a customer is simple , shoot now -focus later . But for accomplishing this task , the camera has to capture all the light that is present at the time of the shot and store it to be manipulated later .  This is one of the points that reminds us that there are so many things left to be invented and the creativity of a human brain is endless.


I am not  just going to give you detailed explanation of the technology behind it . If you are curious about it , you can find it here . 

Add  this magic piece of  technology to your wish list if you are ready to part with your  500 Dollars.  Visit Lytro.com for more details


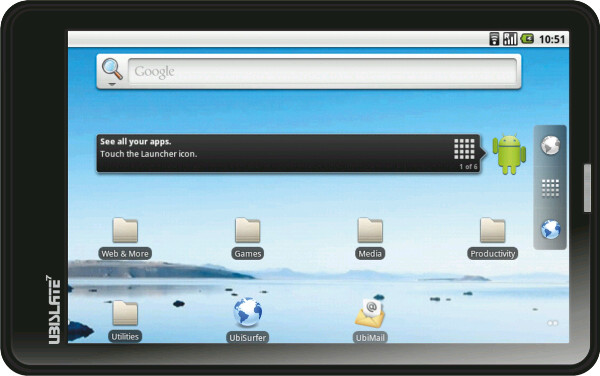
Do not purchase a cheap Tablet – Did I say Aakash ?

There are so many  inquiries regarding how anyone can book an Aakash tablet. I think some people out here are crazy about Aakash just because it is announced to be the cheapest tablet in the world. We, Indians  have witnessed the same enthusiasm towards the booking process of TATA nano few years back.  But the real point is that will you buy anything just because it is available to you for just $50 . So many persons who Google searched for Aakash booking  end up in fake sites and loose their credit card card data to them . And for those who reached the original Aakash website and booked their tablet , the story is not at all different .


Aakash manufacturer and  assembler split

With the war between the original Canadian manufacturer, Datawind  and the  Hyderabad-based  assembly partner  Quad Electronics Solutions Pvt. Ltd gone public , it is quite obvious that there are thin chances that you are going to get your ordered tablets in time or any time for that matter .

The government decision to hand over the order of cheap tablet to private organization which does not have any previous experience in managing such a huge volume of orders was suspicious from the very beginning.

Now the Quad electronics and and Datawind issuing legal notices to each other , we have to suspect that it is just another business tactics played  to fool the thousands of people who spend their money for booking a product which they have not seen yet .

I do not feel much pity about the people who booked Aakash. If someone consider that just being cheap is the only reason for them to order a product that they have not experienced yet ,  they have to learn the fact in a  hard way .