so many discussions are going on about deploying windows 7 easily on a large number of systems . This post is a effort to present the relatively complex concept of windows 7 deployment to a person with normal computing skills . We have deliberately avoided some extra procedure like server share based installation , system image manager based un attended file creation so that you can try this procedure at your home lab.
What is deployment anyway ?
we are discussing the concept of deployment from an IT professionals point of view . The term deployment has its origin from the military and means –To position troops in readiness for combat , but for civilians and computer users like us it means distribute computers or other systems systematically or strategically.
Let us discuss the scenario of installing operating system and application software to only one system . We will surly follow an approach normally known as baby sitting your installation , ie you will sit in front of the computer , place the installation DVD in to the drive , click for what ever may be appearing on the screen until you see the finish button .
But will you follow the same procedure if you have to install OS and application software to 500 systems and you have to finish it with in one day ? How many persons and effort will be needed to finish that task in the prescribed time schedule ? , this is where the concept of software deployment comes in to the scene . Just like the assembly line concept of a car manufacturing plant , Hope you got the point .
Deploying Windows 7 on your organization
With the windows vista family of operating systems , Microsoft made the OS deployment process really easy and easy enough to discuss the matter on sites like this . Let us look what all things you need to start your experiments with OS deployment .
Scenario :
(a)You need to install windows 7 to so many machines on a single day and this routine is exercised everyday .
(b) you have to configure net books or client machines with out optical drives that force you to carry an external DVD drive and perform individual installation on each and every machines .
you can perform the steps explained on this post using third party softwares too , but that makes the total procedure prone to spyware attacks and will not be appreciated by your organization . So we are only using Microsoft tools and procedures through out this exercise .
the official procedure for IT professional include the use of a centralized storage solutions and network connectivity for the complete procedure . We are avioding such complex situations and trying to keep it simple .
What you need :
2 systems capable of running windows 7 or higher operating system and an additional system which will represent your target systems
a USB drive with minimum 8 GB capacity
Windows 7 installation DVD and DVDs of all the software you need in your deployment
Windows AIK (Automated installation Kit) software DVD
1. Windows Automated installation Kit software . Download it from Here
2. First machine is named as technician computer running windows 7 . You are going to install windows AIK on this machine .
3. A reference machine named as Master Computer with a clean windows 7 install with all the required software installed on it.
Procedure :
@ technician Computer :
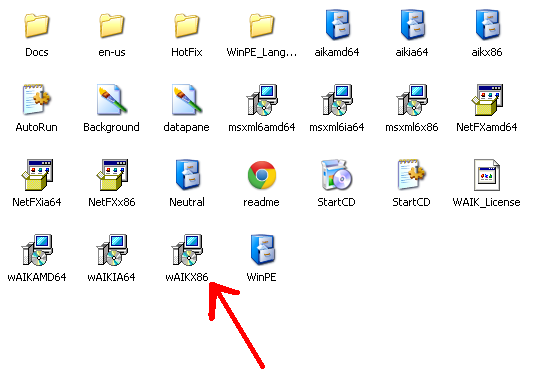
1. Install AIK on the system . there are three architecture for AIK , 32 bit , 64 bit and AMD 64 bit. For our session we are going to use the 32 bit ie X86 Architecture .
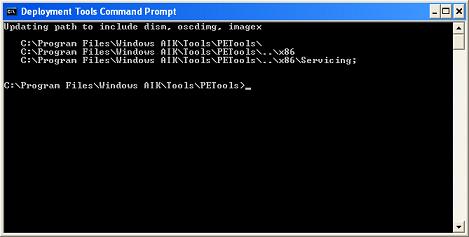
After the AIK is installed it will show up on the program files . Go to deployment tools command prompt to open a specifically configured command prompt for the deployment process .
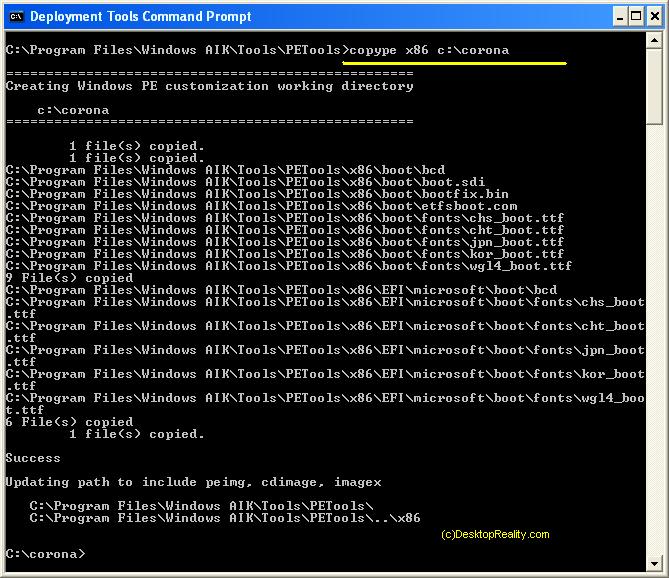
Now use copype .exe command at the command promt to create the boot struture for your USB or CD media .
copype.exe x86 c:\corona where corona is the folder to which you are going to copy the structure for boot files
copy the file named winpe.wim from the c:\corona directoy to c:\corona\iso\sources and rename it as boot.wim . the boot process need this file to be in the exact path and name as mentioned for the proper boot process .
Now copy the imagex.exe file from C:\Program Files\Windows AIK\Tools\x86 to c:\corona\iso
imagex.exe is the software that is going to capture your master computer data to a single wim file. So do not skip this step.
Now you have to make your pen drive boolable in windows PE so that we can capture the image of the master computer and apply it to the target systems
Installing windows PE to the USB drive :
insert the pen drive to your technician computer running windows 7 and make sure it is shown up a drive in my computer
go to command prompt by typing cmd at the run option
type diskpart at the command prompt . and you will reach the disk part prompt . It is an interactive prompt as shown below
now run the command list disk to show the list of disks . if you have only one hardisk disk on your system , the usb drive will show up as disk 1
DISKPART > list disk
DISKPART >select disk 1
DISKPART > clean
DISKPART >create partition primary
DISKPART >select partition 1
DISKPART >active
DISKPART >format fs=ntfs quick
DISKPART >assign
DISKPART >exit
Now copy all the contents from c:\corona\iso to the root of your pen drive . ( here H:) this step is critical , do not miss it
Now insert the windows 7 dvd to the technician computer , from command prompt run the bootsect.exe which is located on the boot directory so copy the boot records to the pen drive . we are assumbing the pen drive has a drive letter H: and DVD drive is G:
g:\boot\bootsect.exe /nt60 h:
Now the process on your technician computer is almost over . you can move to master computer to capture the contents to a WIM file
@ Master Computer :
First thing you have to take care is that your master computer need a fresh installation of windows 7 . Do not activate the product onlne . let the process of activation performedat the target system.
Now we have to remove all the drivers specific to the hardware of the master computer by running sysprep command
c:\windows\system32\sysprep\sysprep.exe /oobe /generalize /shutdown
after a while the system will shut down . Please do not bring up the windows 7 on this machine again now by turning it own. It will reload all the drivers back and will reverse the effect of this command.
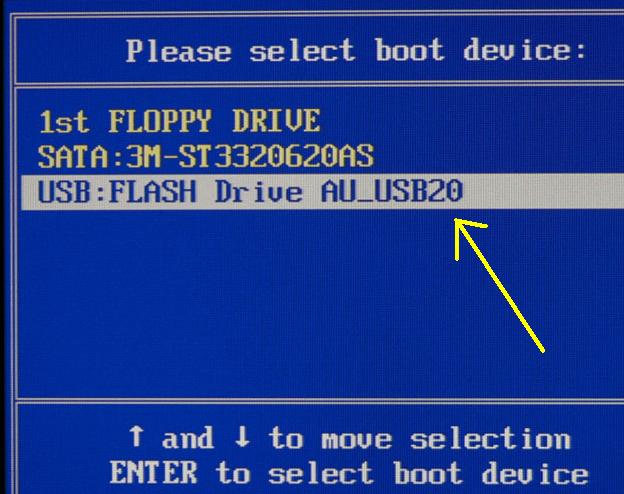
Now boot the master computer from the pen drive we prepared on the previous exercise
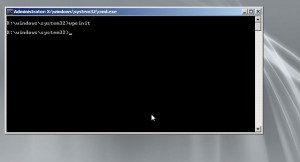
windows PE will boot up and will reach a command prompt .
Now we need to capture the contents of your windows drive to a single .wim file . to do that execute the imagex.exe command from your pen drive command prompt. On this scenario we are assuming that your you pen drive is on E: and the windows partition is on D:
e:\> imagex.exe /capture d: e:\win7image.wim “My Win7 Image ” /compress fast /verify
Now what ever may be content of the windows partition is copyied to a single wim image and saved on your pen drive . Hope you are using a high capacity pen drive of atleast 8 GB so that the image will fit in to it . It will take 10 minutes or so depending on the softwares you installed on your master computer .
Now the procedure on your systems are almost over . Now you can move to any of your target computers to try out if it is working prefect. But if you are reading it for all the while and doing it , we recommend you to take a break and come back to read the next section .
Now we are all set to install the captured image WIM file to your netbooks , laptops or office client machines. The procedure to be done at your target systems are as follows
a. boot from the pen drive you prepared
b. clear all the partitions and set up new partitions .
c. apply the WIM file on the USB disk to the target system and make the system bootable
for all these procedure mentioned above we are using batch and script files to make the life easier for you . So we are back to our technicians Computer for a while to create that . don’t worry …it is lot easier than you think . so back to machine number 1

Plus the USB drive to your technician computer , assume the drive letter is E:
use notepad to create the following script file to be used with disk part and name it myscript.txt. You can just copy and paste from this post
select disk 0
clean
create partition primary size=300
select partition 1
format fs=ntfs label=”System”
assign letter=S
active
create partition primary size=30000
select partition 2
format fs=ntfs label=”Windows” quick
assign letter=C
create partition primary
select partition 3
format fs=ntfs label=”Data” quick
assign letter=d
exit
we assigned 30 GB for your C drive and rest of the space for your D drive . Feel free to modify the script to adjust the size
Now create a batch file on the root directory of your pen drive as follows . Use notepad to create the file and name the file as boot.bat
diskpart /s myscript.txt
imagex.exe /apply win7image.wim 1 c: ….. please not that you do not miss the 1 on this command
c:
c:\windows\system32\bcdboot.exe c:\windows
exit
Now move towards your target system , plug th USB , boot from IT , wait for the windows PE to reach the command prompt , and type our magic command named boot at the command prompt and rest will be handled by our faithful batch file
Wait for the action to finish and reboot your system to bring up the windows 7 fully configured with all the software and settings you needed in less than 10 minutes. Now you have the magic of installing windows 7 on a tiny thumb drive. Please note that the above procedure work well with windows server 2008 also
Please give us a feed back on the post after you try it on your environment and do point out any typos or factual mistakes





nice to know , the command prompt option for changing the ip address will come handy on this situation , please try changing the ip from the command prompt try this
netsh interface ip set address “local area connection ” static 192.168.10.10 255.255.255.0 192.168.10.1
Hope it helps someone
Hi, I read your guide and found it very informative. But I do have a question, Now that I have a Pen drive to install windows 7 from.
Now how do I install win 7 from the Pen drive to 50 desktops? Do I physical visit each desktop plugin in the Pen drive one after the other or is there another way of deploying win 7 from the pen drive to 50 desktop at the same time avoiding plugin the pen drive in each target desktop.
Finally the both the myscript.txt. and bat file do I copy them both into the pen drive?
Thanks
that process will call for using a deployment server than a pen drive .
Can u name any deployment server..
Why these 1000 steps !.Use Norton ghost it takes 5 minutes.
if something seems too simple , just think that there are some thing that you are missing
I have one doubt .how the activation of operating system is done .according to microsoft on eoperating system is for one computer and they track the ip adress and other hardware details before activation and activate it for that system. and each system is identified.then how it work on a number of computers?
Windows Deployment easily can be done with Ease Us Todo backup free software.